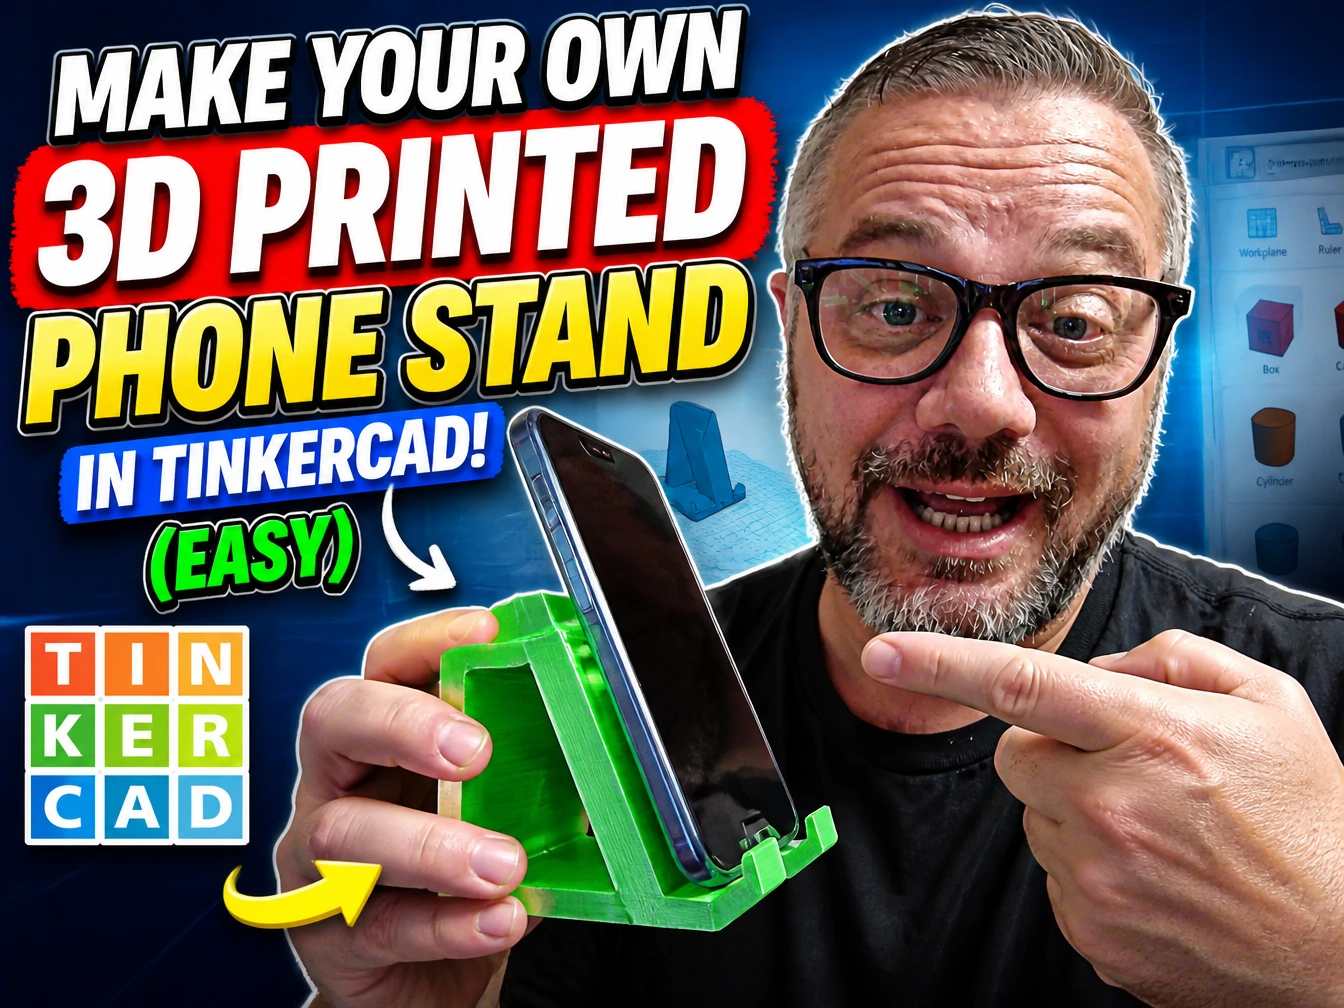
Design a 3D Printed Phone Stand in Tinkercad – Beginner Friendly Guide
Want to design and 3D print your own phone stand but have never touched a CAD program before?
Tinkercad is the easiest place to start — it’s free, runs right in your browser, and doesn’t need any prior design experience.
In this beginner-friendly tutorial, I’ll walk you through building a sturdy A-frame phone stand from scratch, complete with a built-in cable-access notch so you can still charge your phone while it’s docked, plus a personalized text engraving on the back.
By the end you’ll have a finished model ready to export, slice, and print on your own machine. Grab a coffee, open a new Tinkercad design, and let’s build it together, step by step.
What You’ll Need
- A free Tinkercad account (tinkercad.com)
- About 15 minutes
- A slicer (this build uses Bambu Studio) and a 3D printer if you want to print the final design
If You Would Rather Just Download The File:
Step 1 – Start a New Design
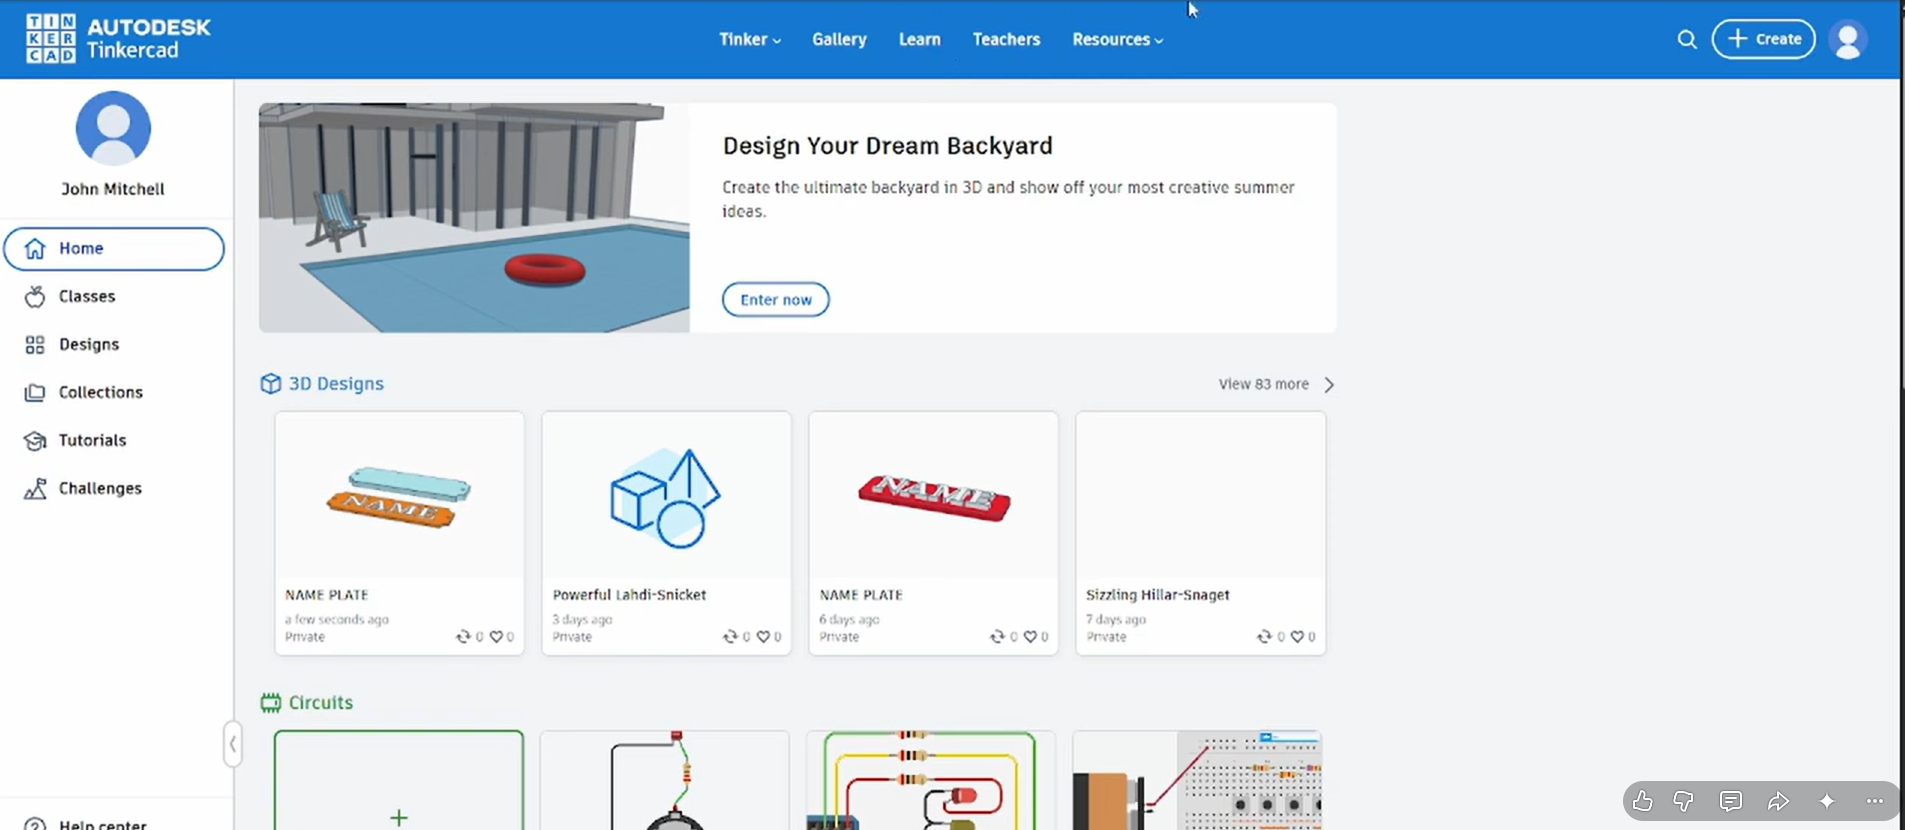
Log into Tinkercad and open the dashboard. Click Create > New Design (or open one of your existing 3D Designs) to land on a blank Workplane.
Step 2 – Drop In a Roof Shape for the Back Support
From the Basic Shapes panel on the right, drag a Roof shape onto the Workplane. This triangular prism becomes the angled back support the phone leans against.
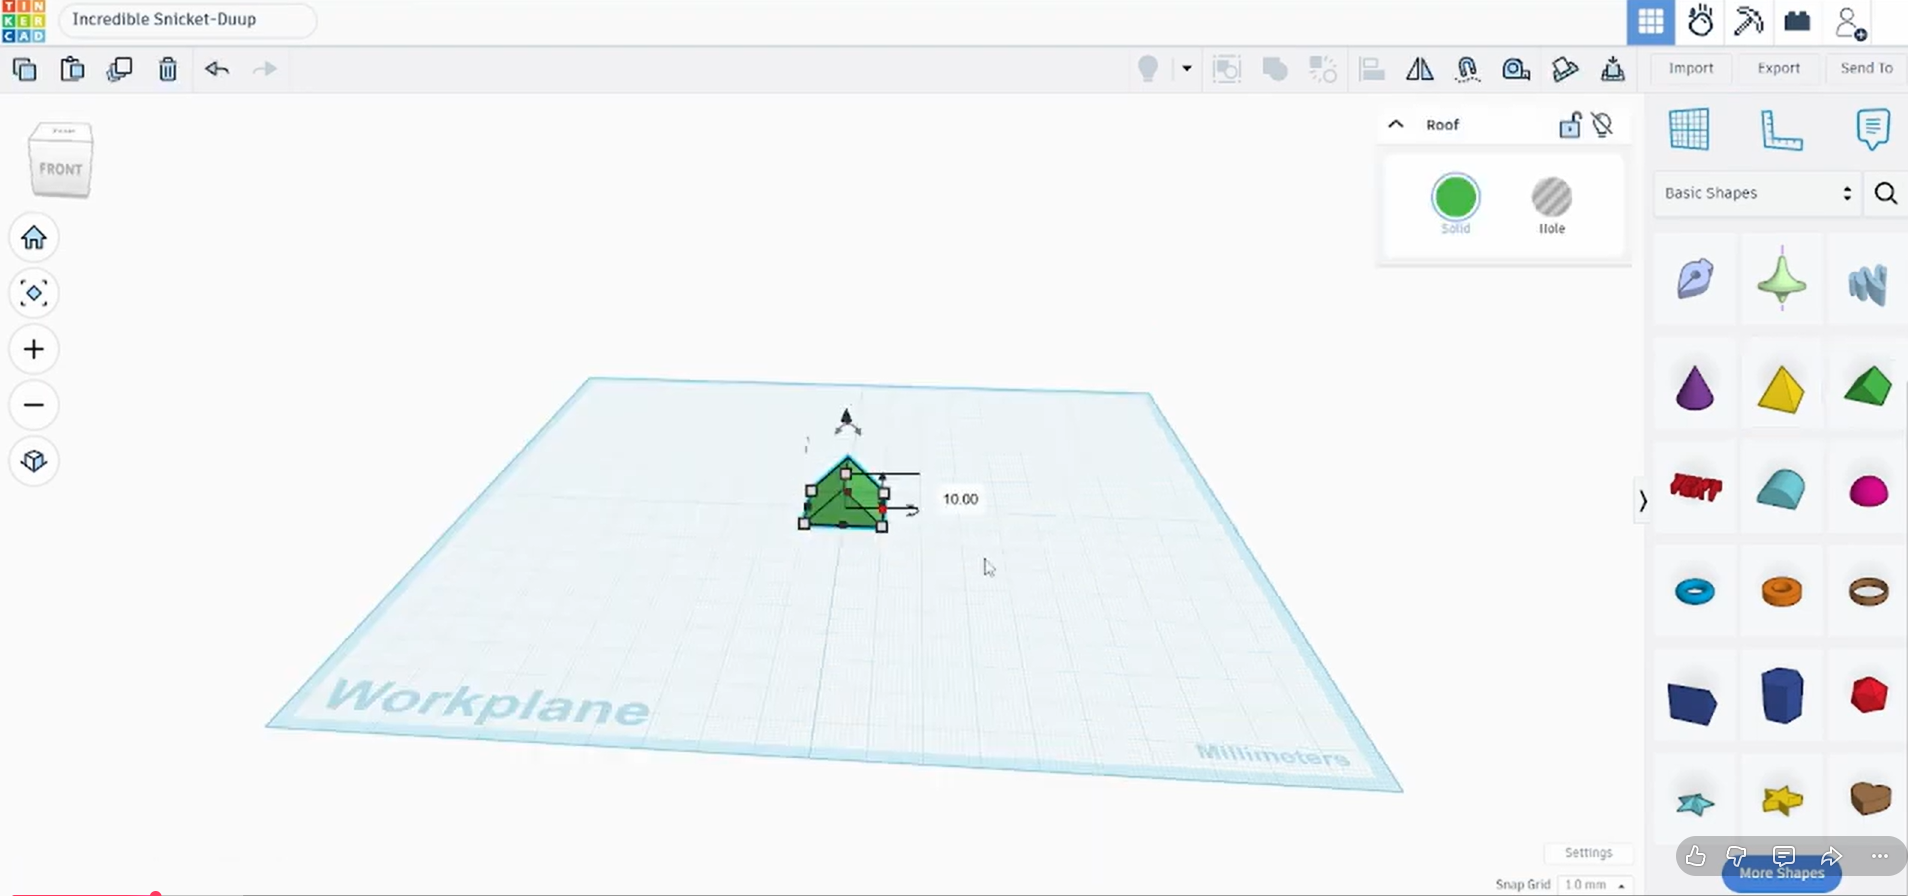
Switch to the Right view (using the view cube in the top-left) to check the shape square-on before resizing.
Step 3 – Duplicate the Roof and Turn It Into a Hole
Copy and paste the Roof shape (Ctrl+C / Ctrl+V) so you have two identical triangles. Resize the first one to be the larger, outer shell (roughly 90mm wide in this build) — this is the solid outer shape.
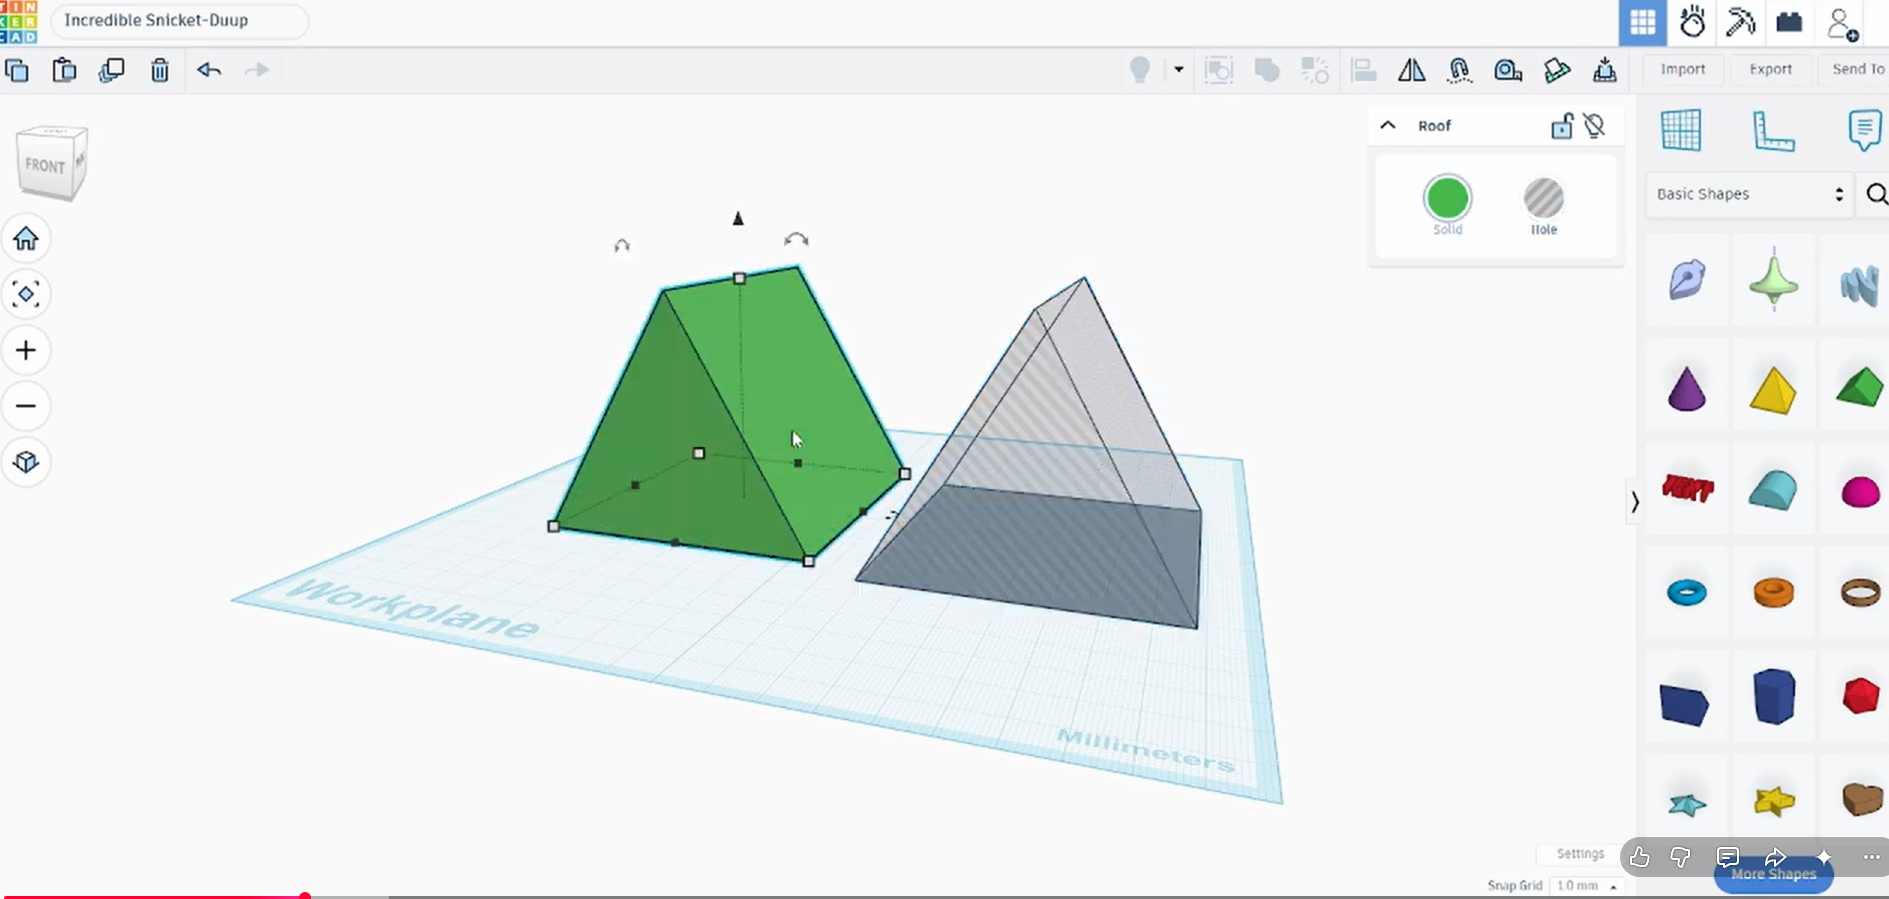
Select the second, slightly smaller Roof shape and click Hole in the shape panel. This turns it into a cutting tool instead of solid material.
Drag the hole shape so it sits inside the solid Roof shape, offset toward the front. This is what carves out the hollow A-frame and leaves a lip at the bottom where the phone will rest.
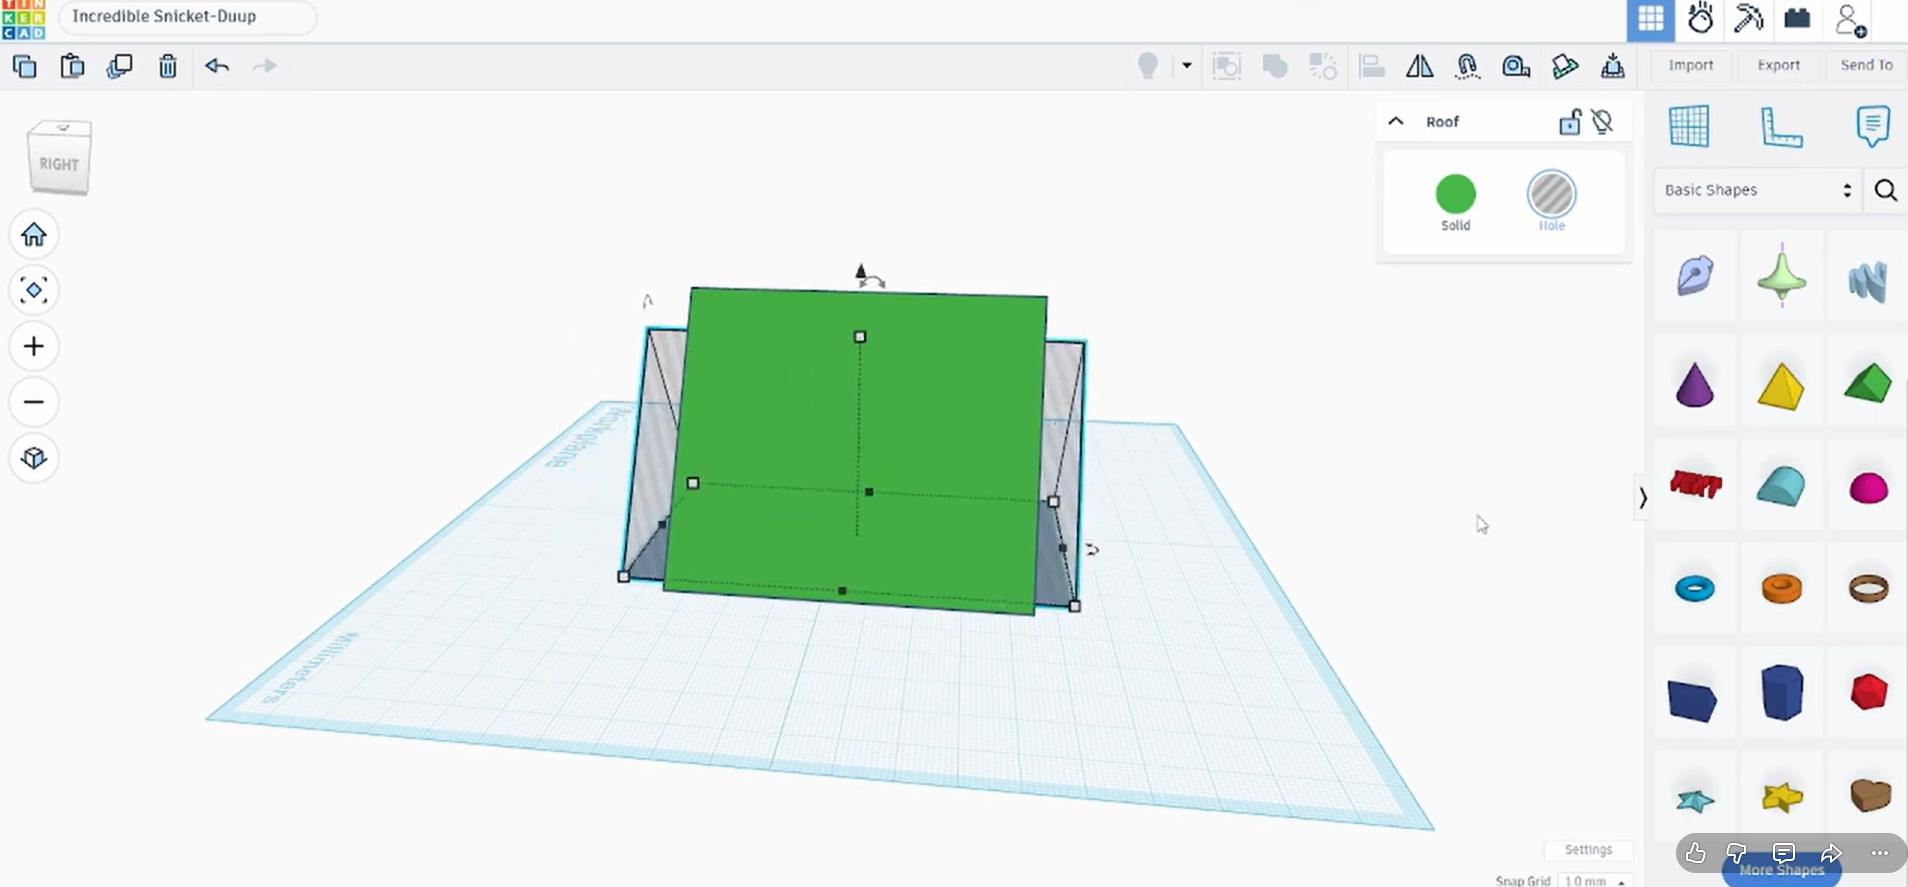
Rotate to the Back view to double check the hole shape lines up evenly through the solid shape on both sides.
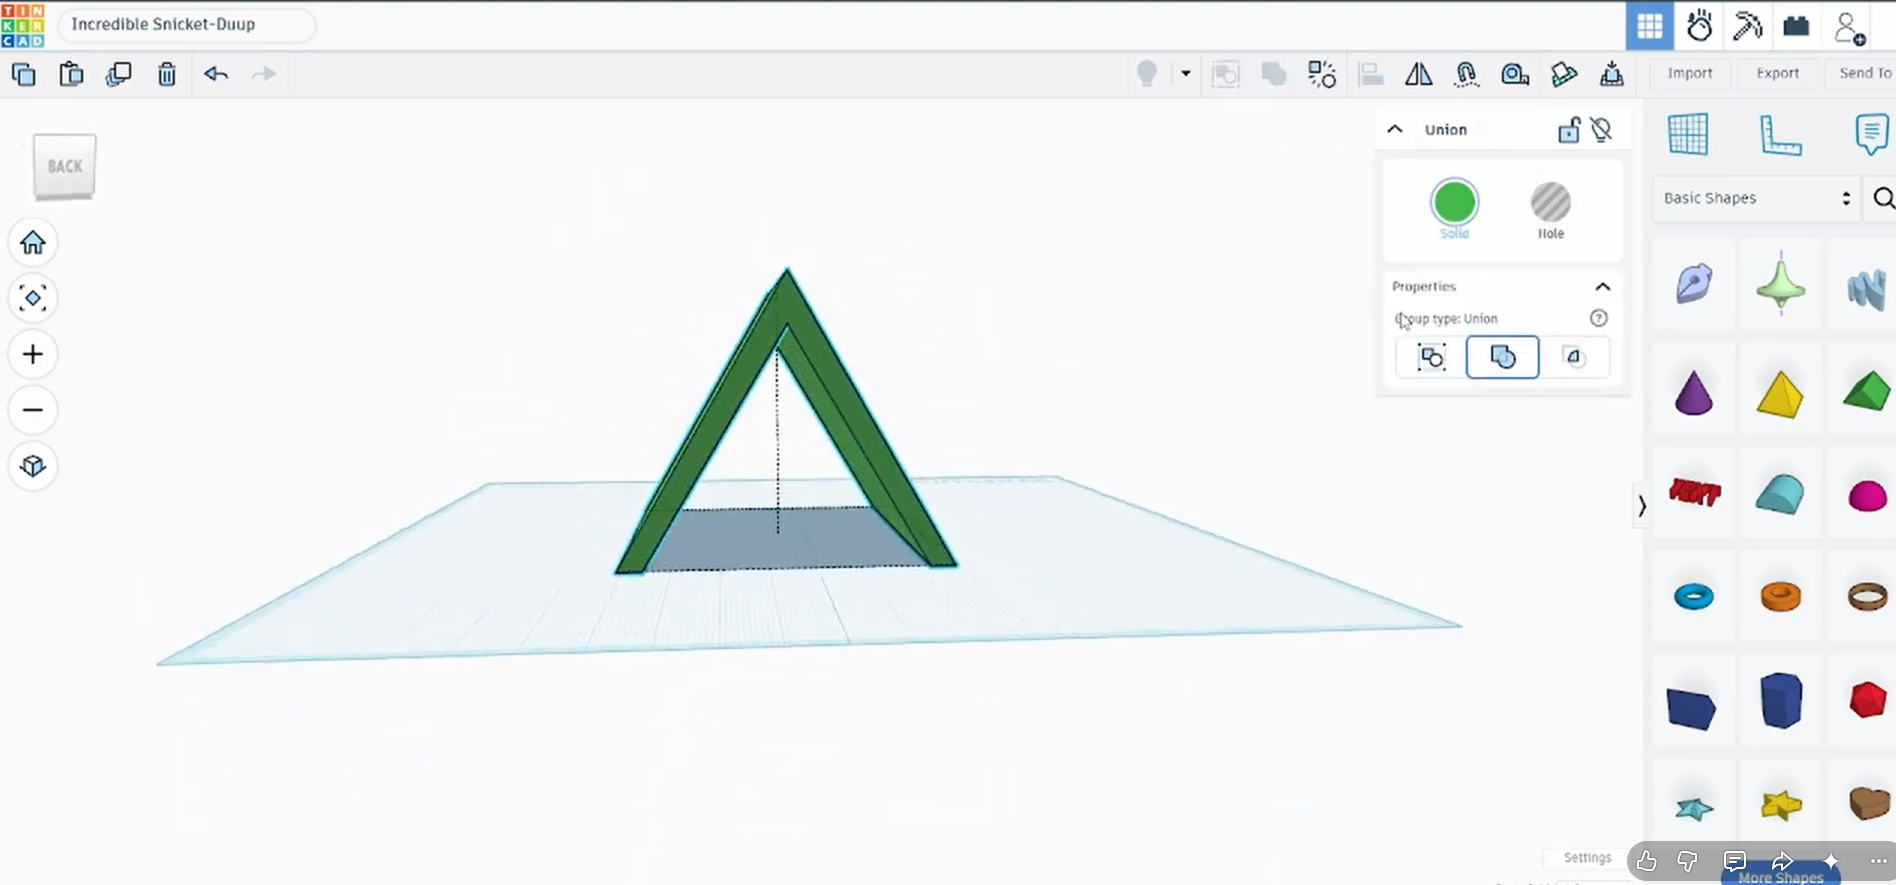
Switch back to Front view. You should now see a hollow, tent-shaped support with an open groove at the bottom front — this is where the phone will slot in.
Step 4 – Add the Front Ledge
Drag a Box shape onto the Workplane. In the shape’s Properties panel you can round its edges using the Radius and Steps sliders if you want a softer look.
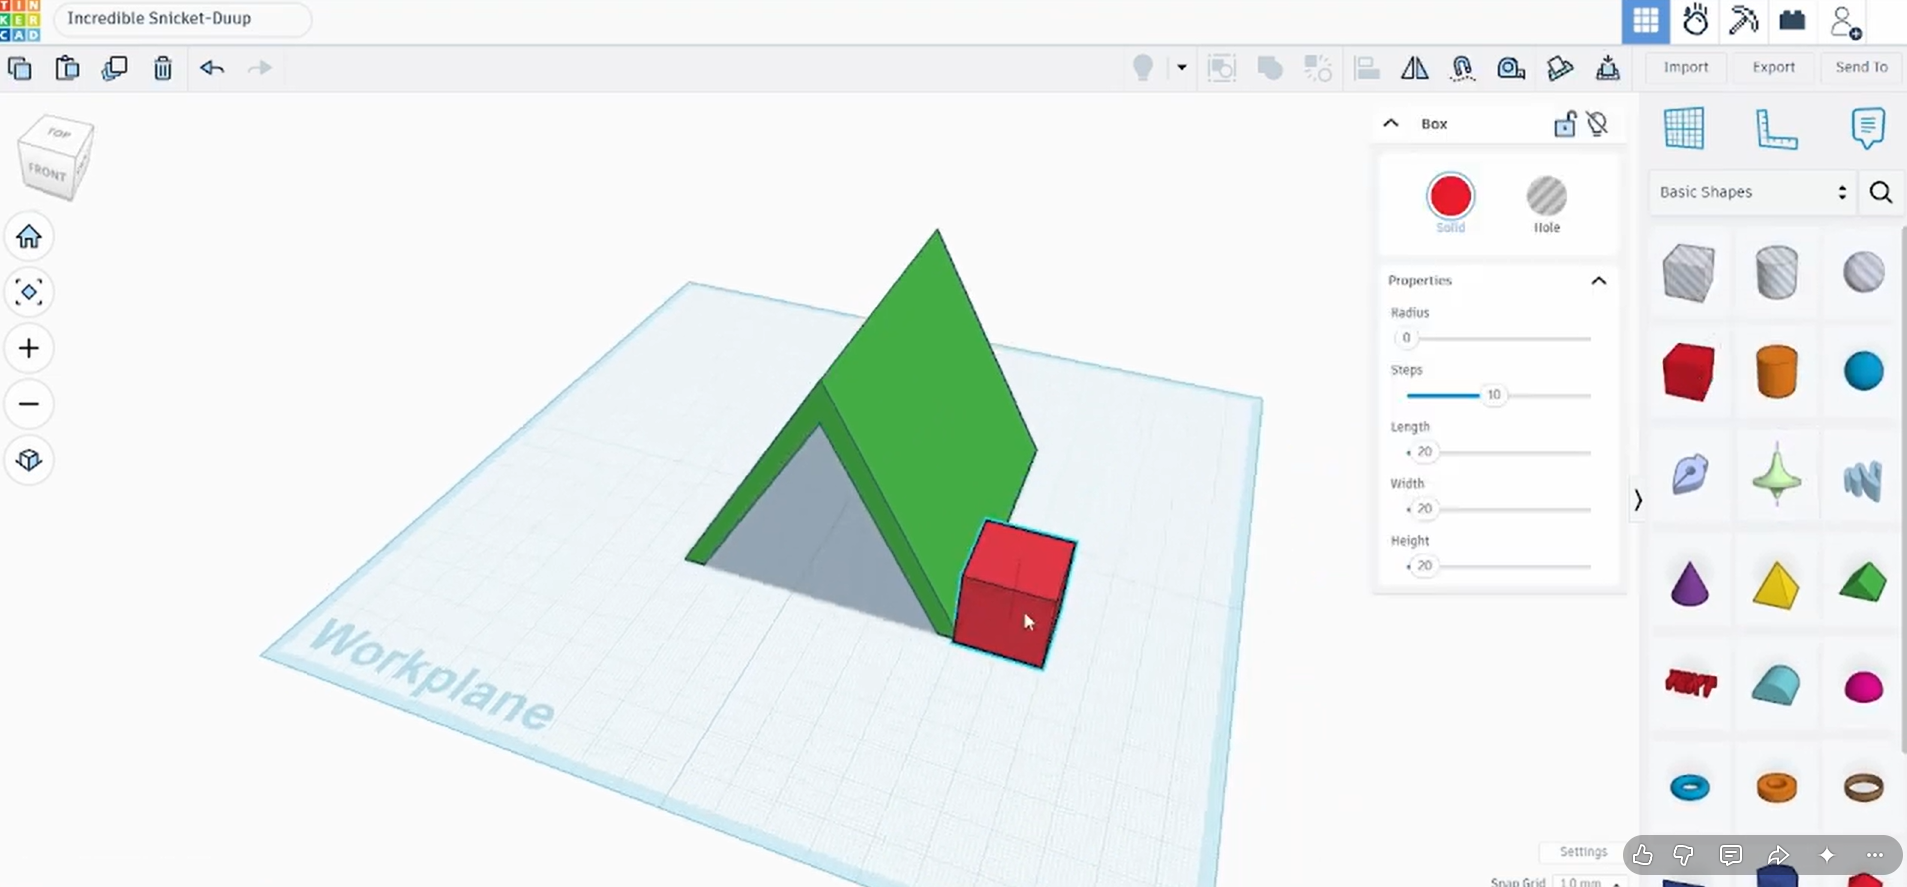
Resize the box into a long, low block — around 60mm long by 20mm wide in this build. This becomes the front ledge the bottom edge of the phone sits on.
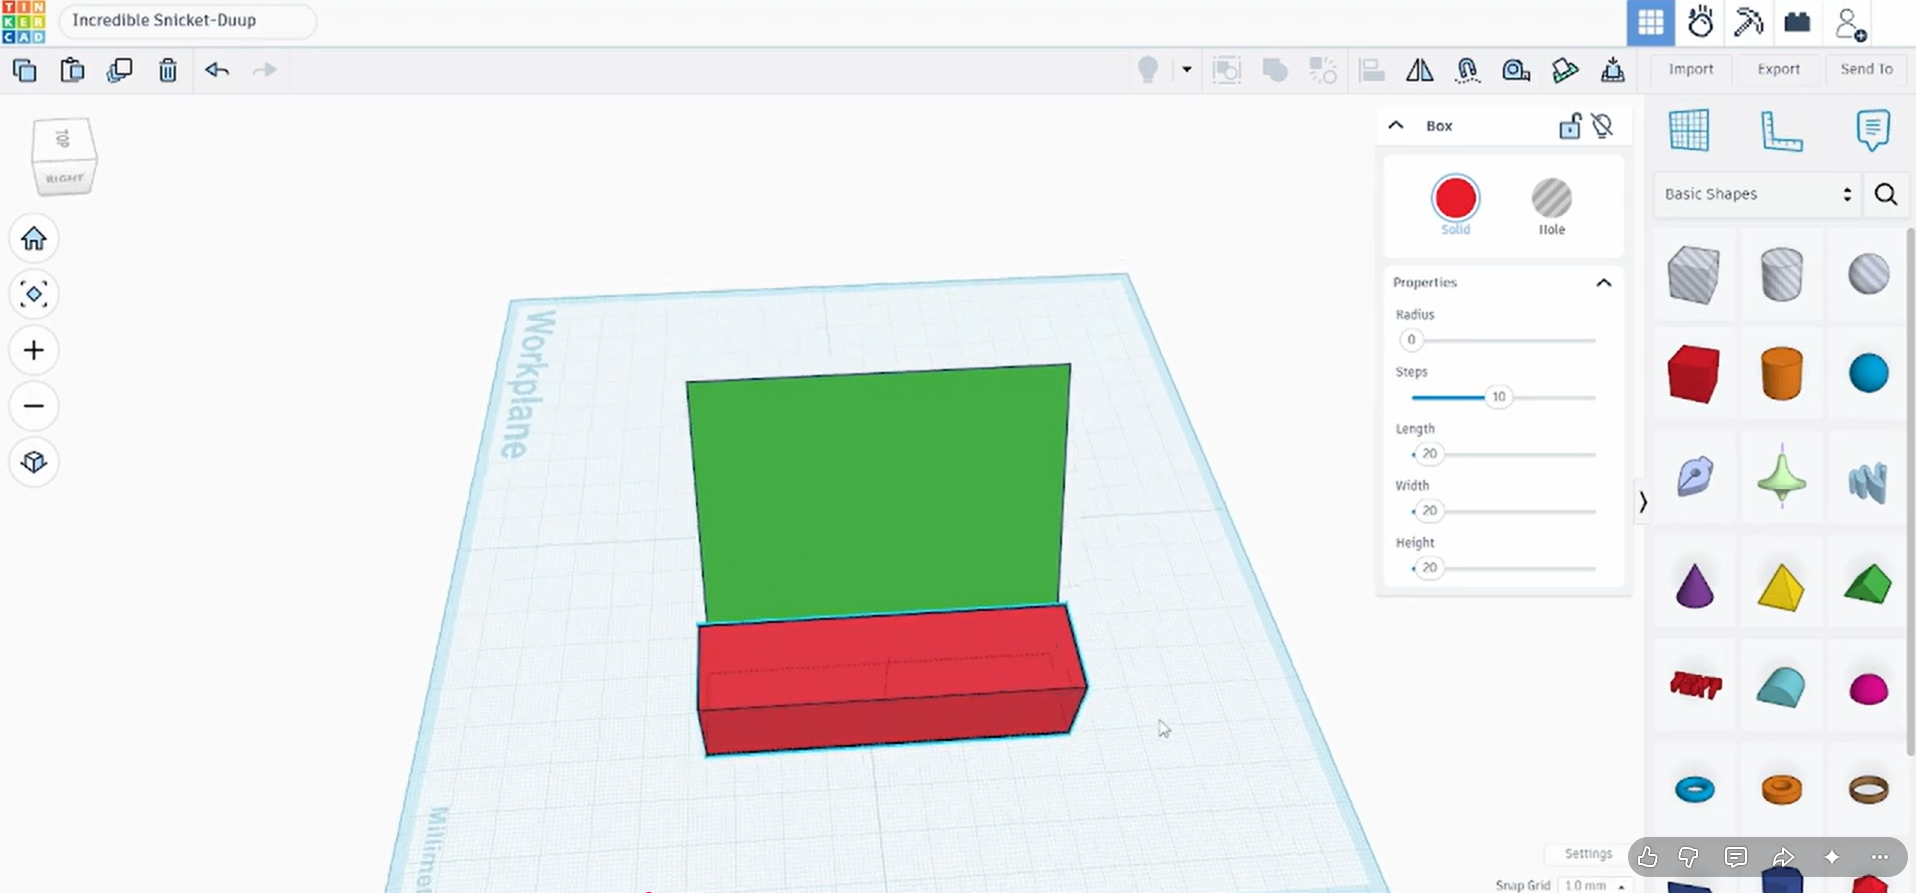
Drag the box into place directly in front of the hollow A-frame shape, lined up with its base.
Select both the A-frame and the ledge, then click Group (or Ctrl+G). Tinkercad merges them into a single solid piece.
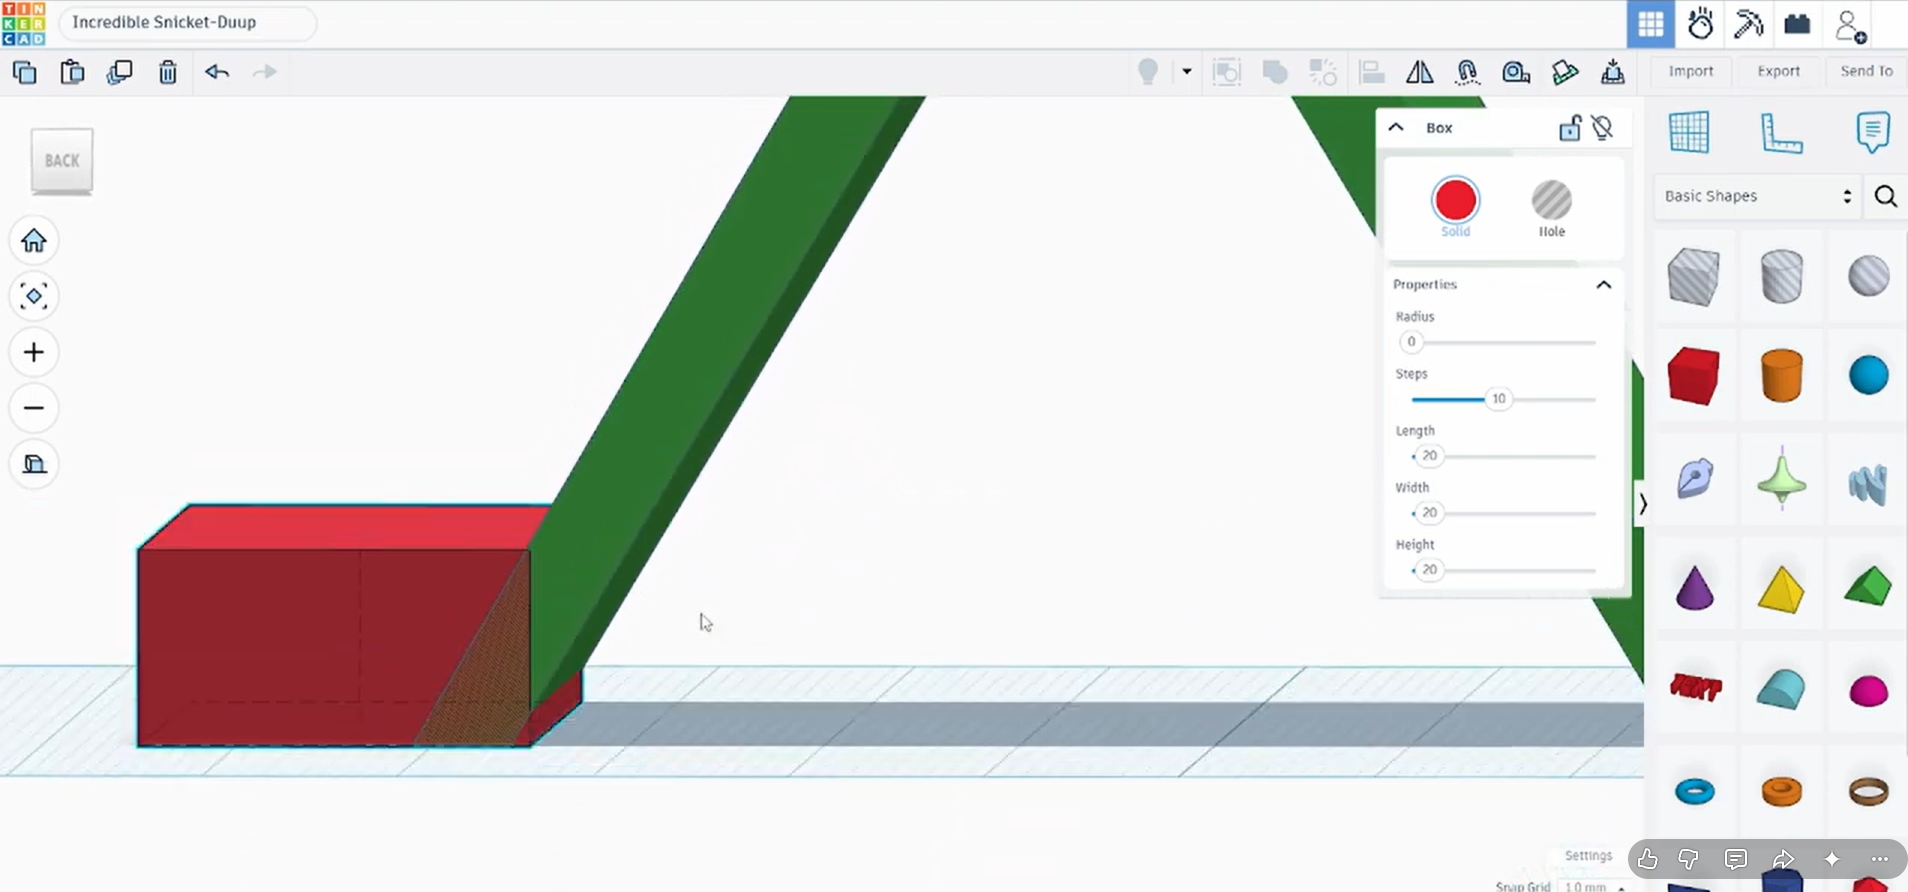
Rotate around to Side view to confirm the back support and front ledge now read as one continuous piece.
Deselect to see the clean result: an A-frame back support with a front lip and a groove running along it for the phone to sit in.
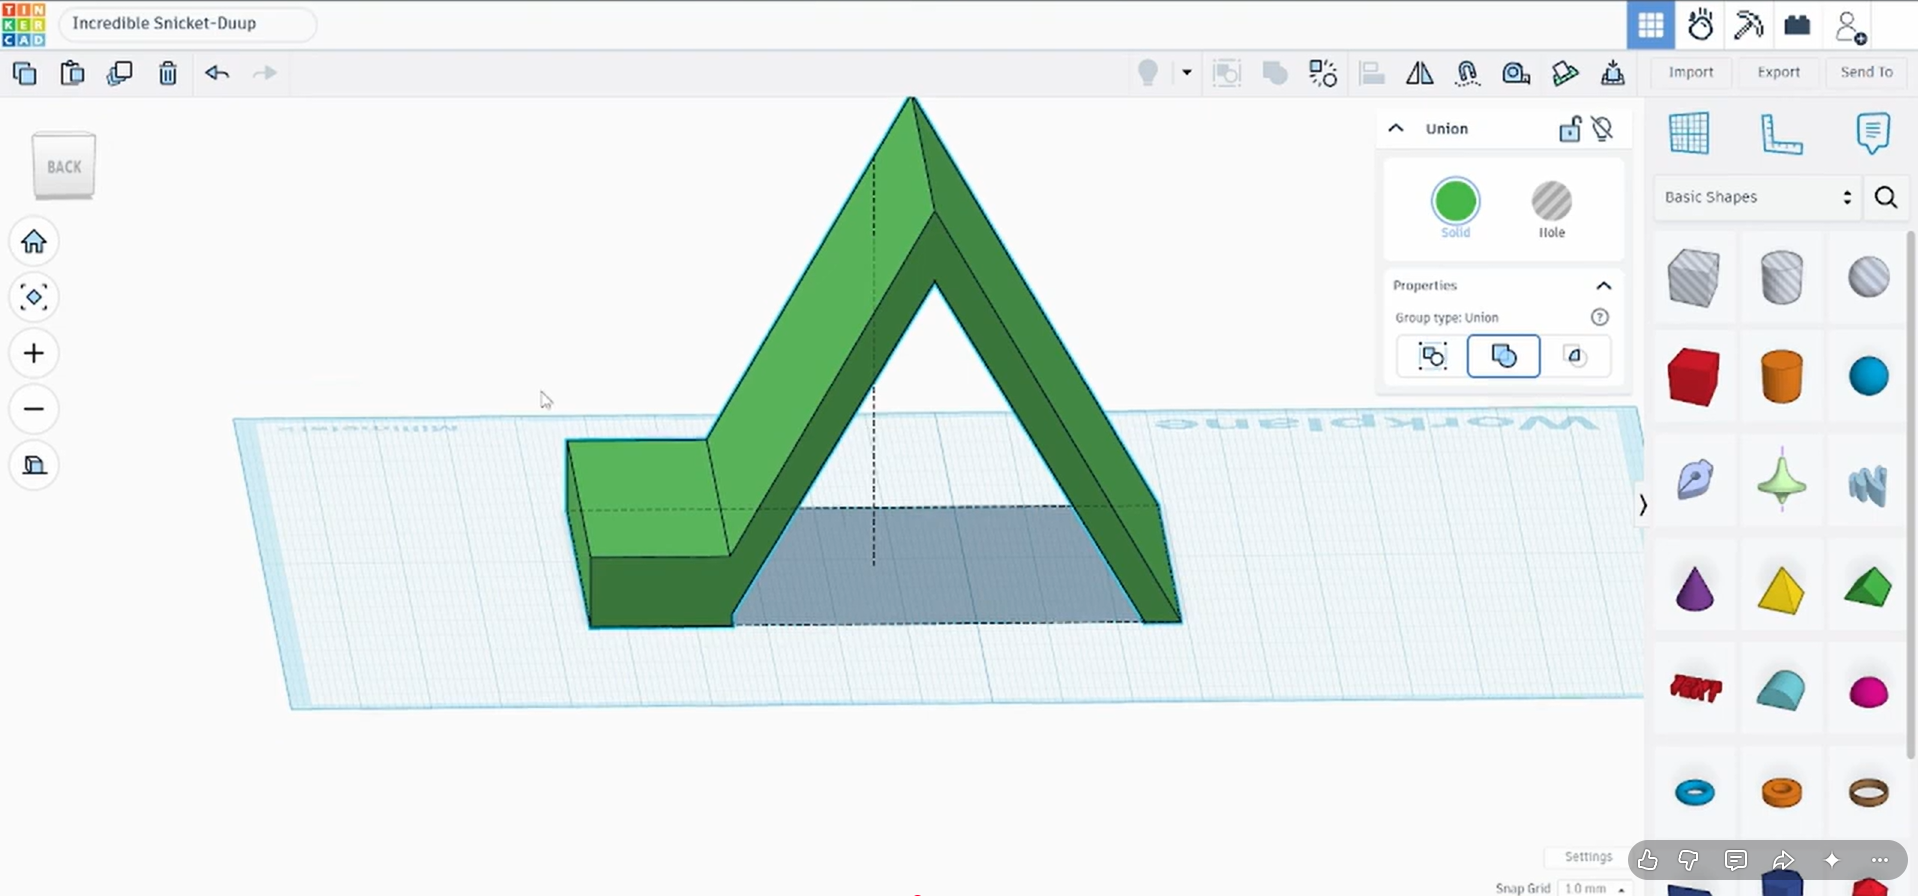
Step 5 – Cut a Cable-Access Notch
Drag another Box onto the model, centered on the front ledge, and set it to Hole.
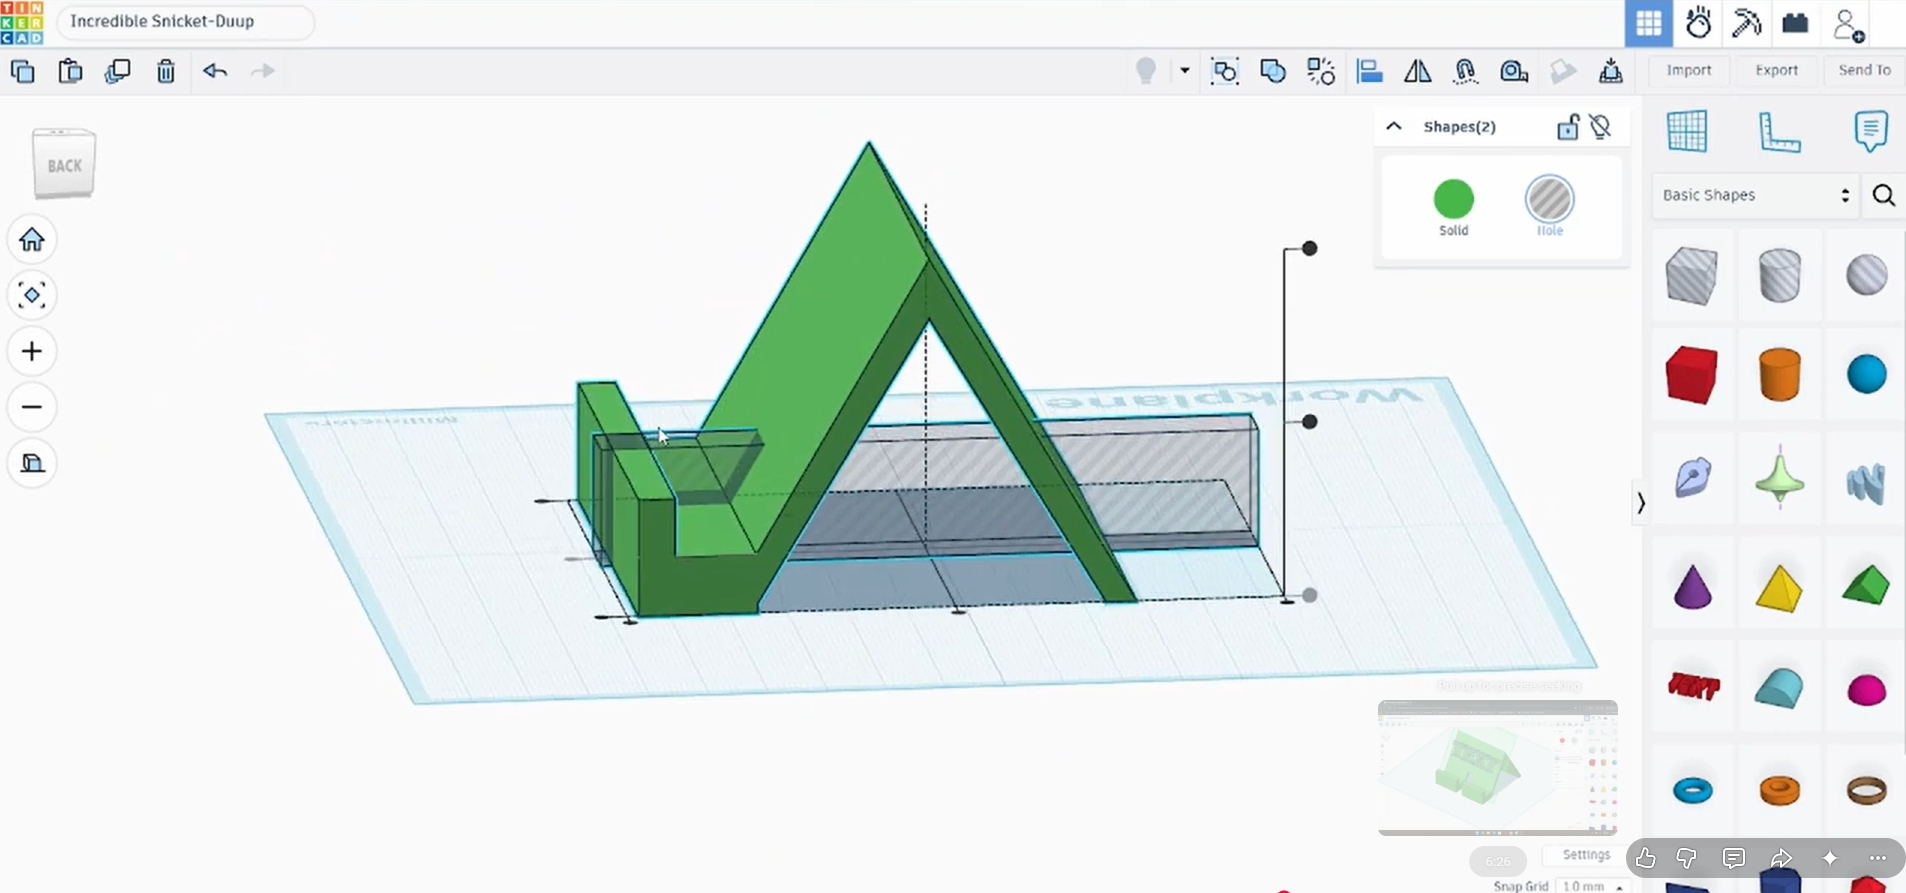
Resize and center this box so it cuts a notch straight through the middle of the ledge (about 30mm wide in this build) — this leaves a gap so you can still plug in a charging cable while the phone is docked.
Select the ledge and the new hole box together and Group them. The notch splits the front ledge into two separate feet with a gap between them.
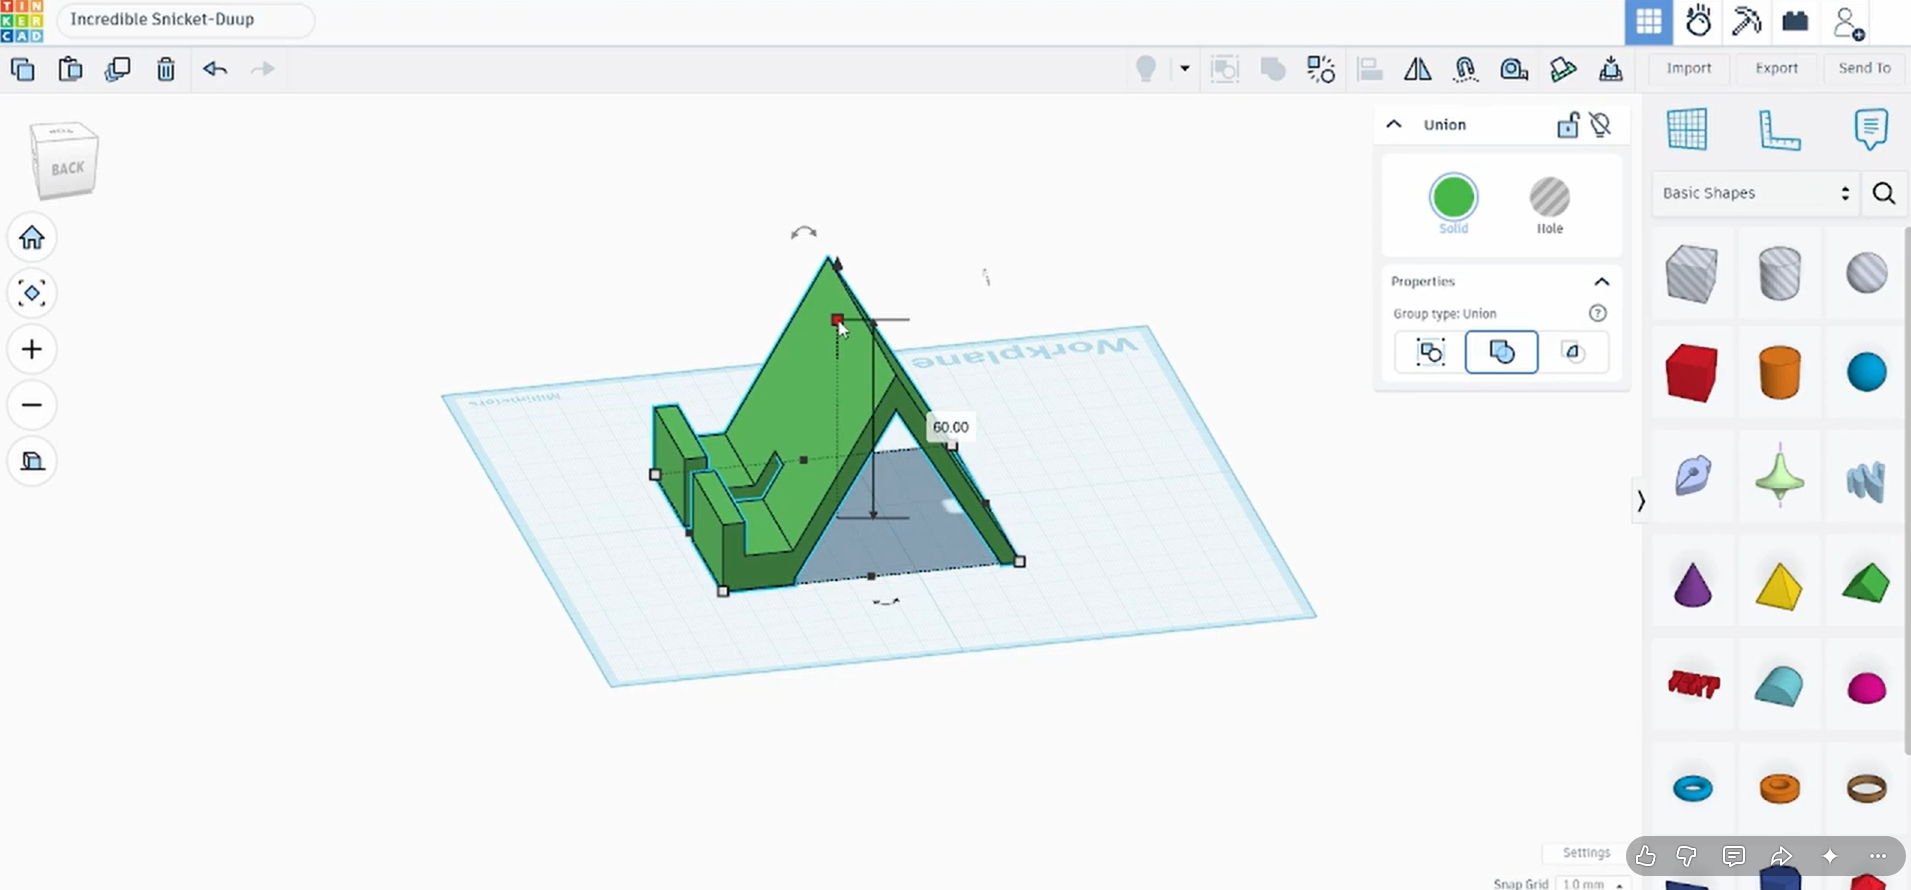
Check the back view to confirm the cut goes all the way through, then deselect to see the finished stand: A-frame back, two front feet, and a center cable notch.
Step 6 – Add a Personalized Label
Drag a Text shape onto the model and position it on the angled back panel. In the Properties panel you can change the font and adjust the Height, Bevel, and Segments of the letters.
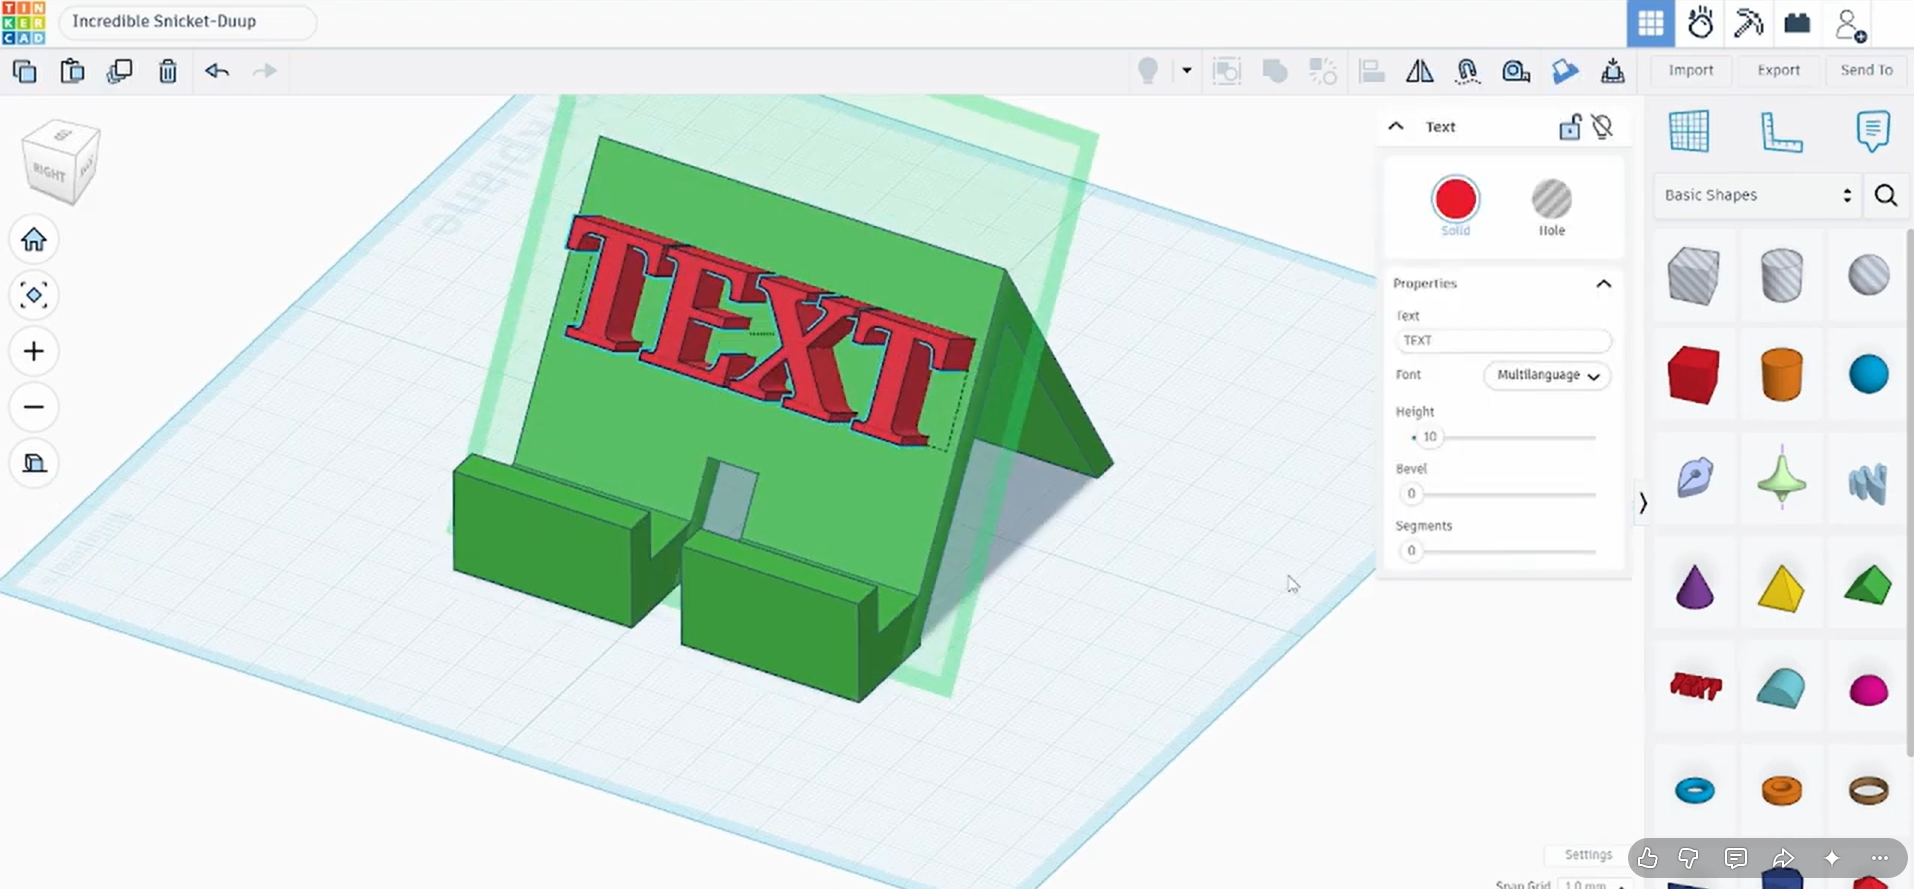
Double-click the text to edit it (this build uses “iPhone” — swap in whatever label you like), then set it to Hole so it engraves into the surface rather than sitting on top.
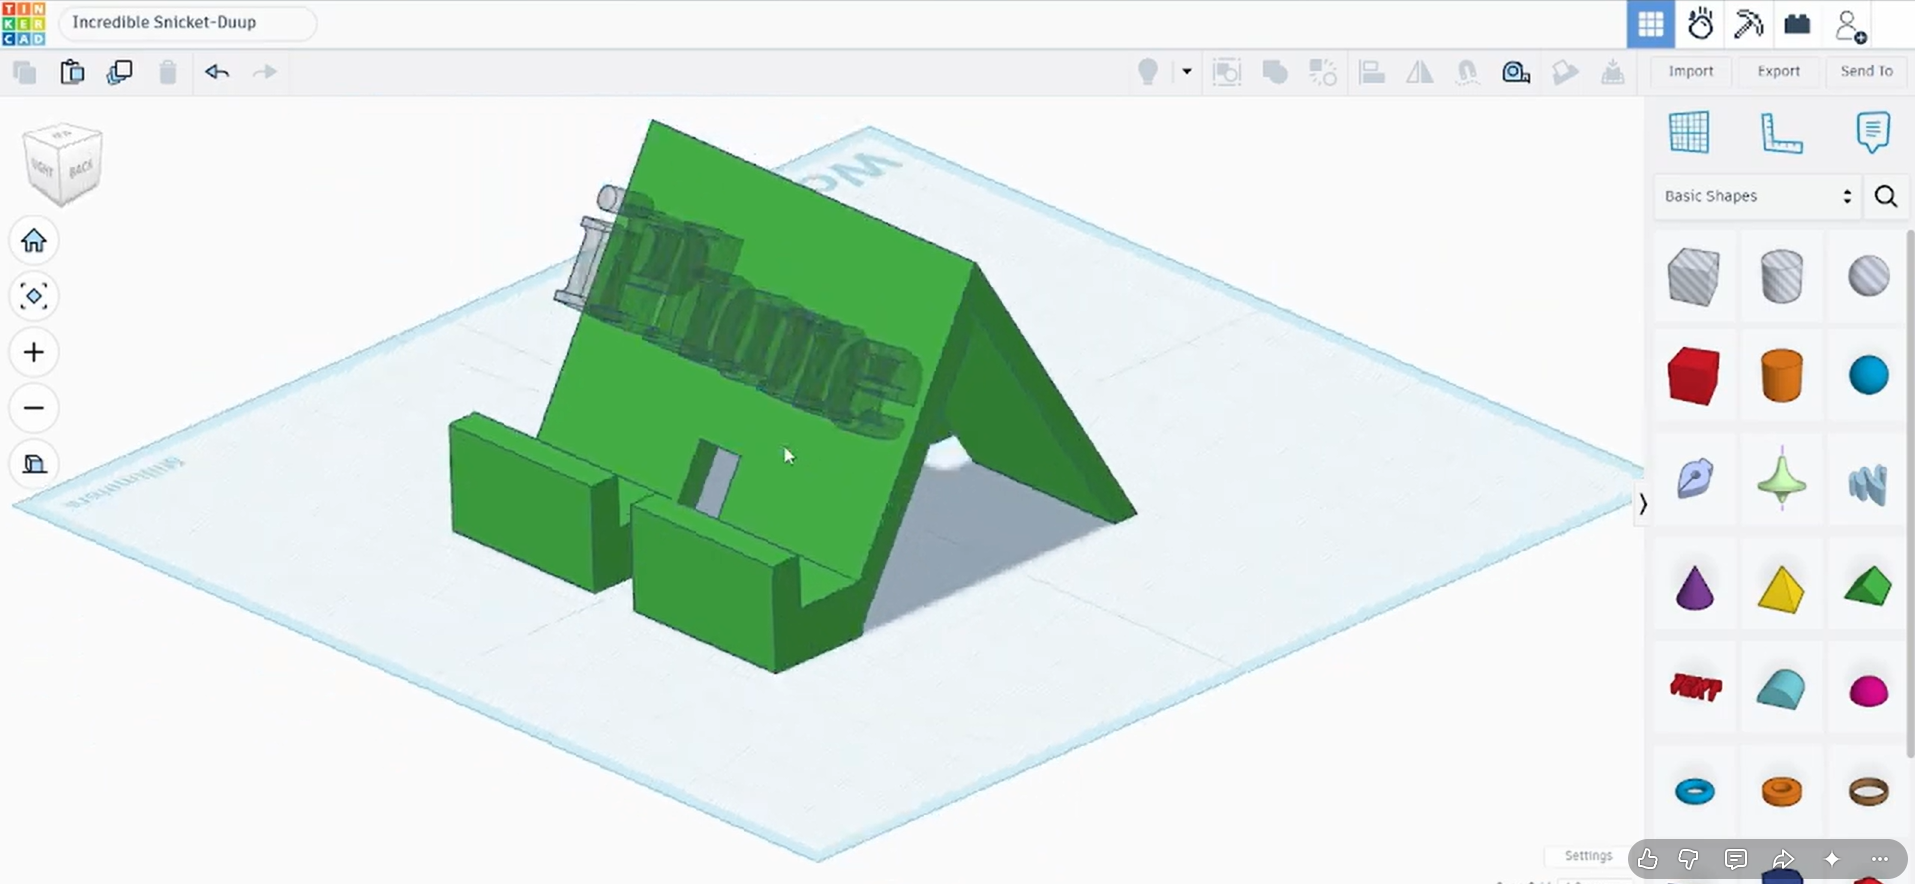
Select the text and the main body together and Group them. The label is now engraved into the back panel as part of the single solid model.
Step 7 – Export and Slice
Export the finished design as an STL (Export button, top right) and open it in your slicer — this build uses Bambu Studio.
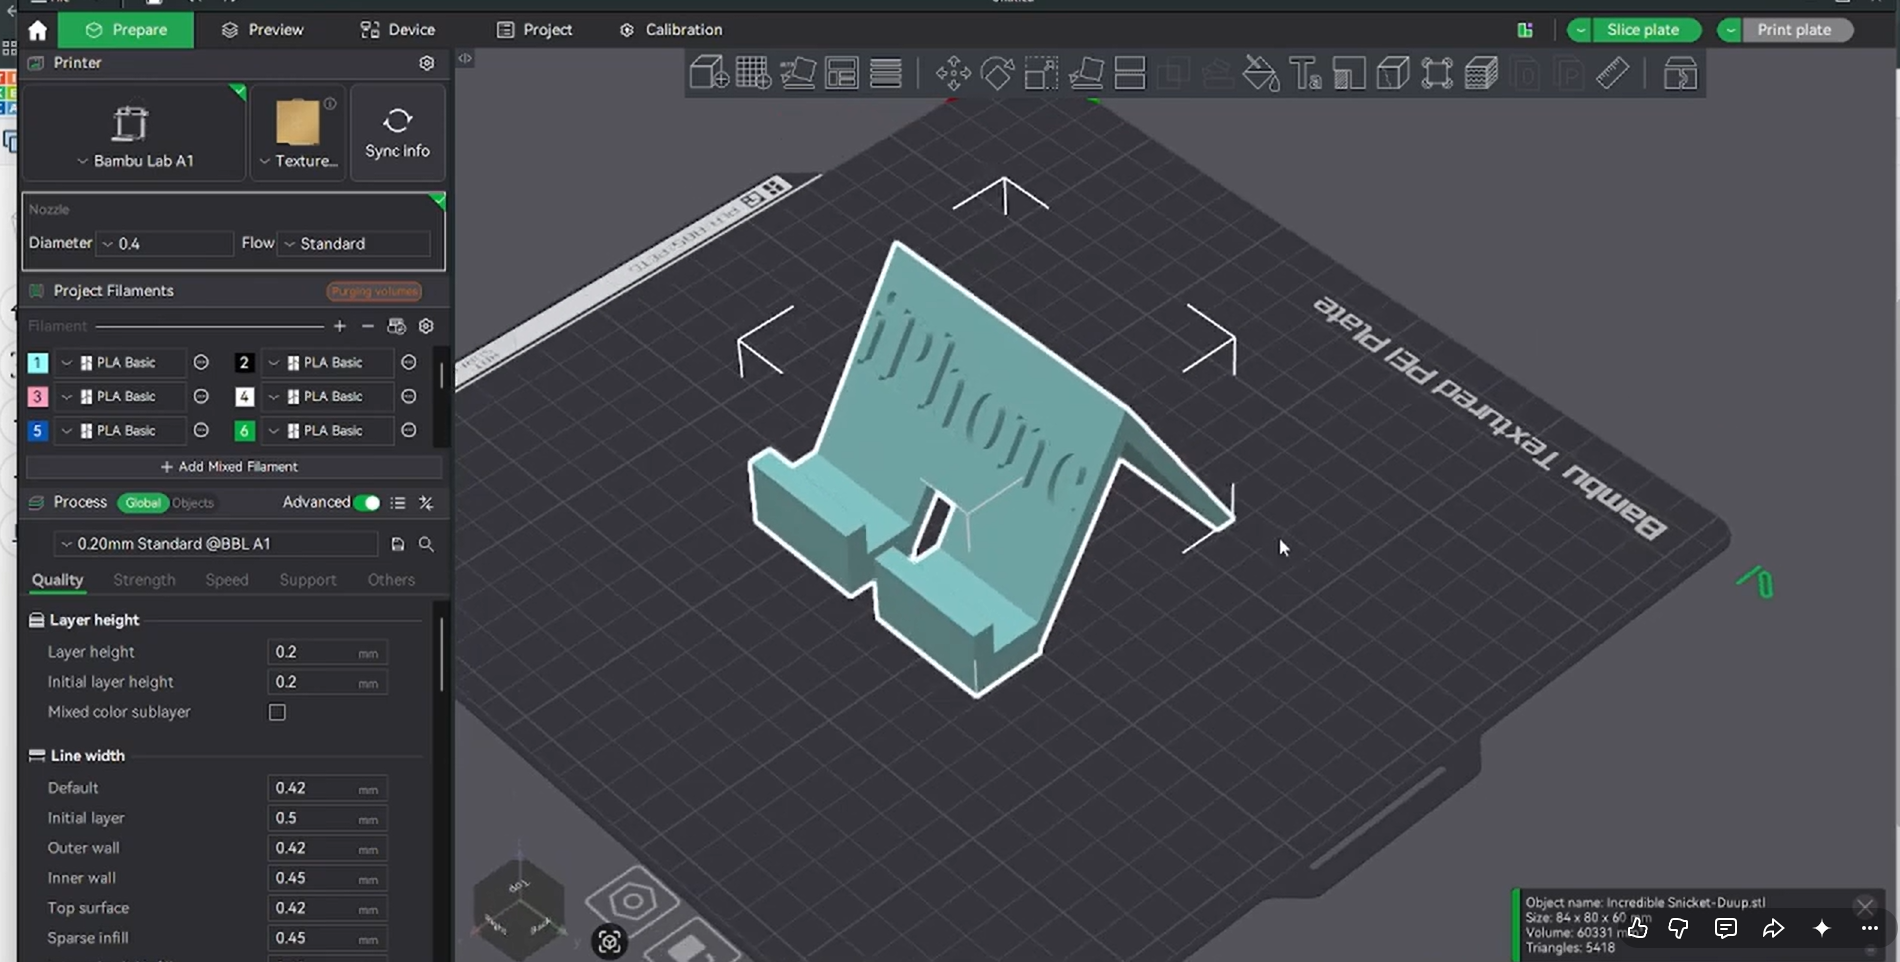
With the model loaded (sized about 84mm x 40mm x 90mm here, printed on a Bambu Lab A1), turn on supports since the A-frame overhang needs them — this build uses Tree (Auto) supports with a 30° threshold angle.
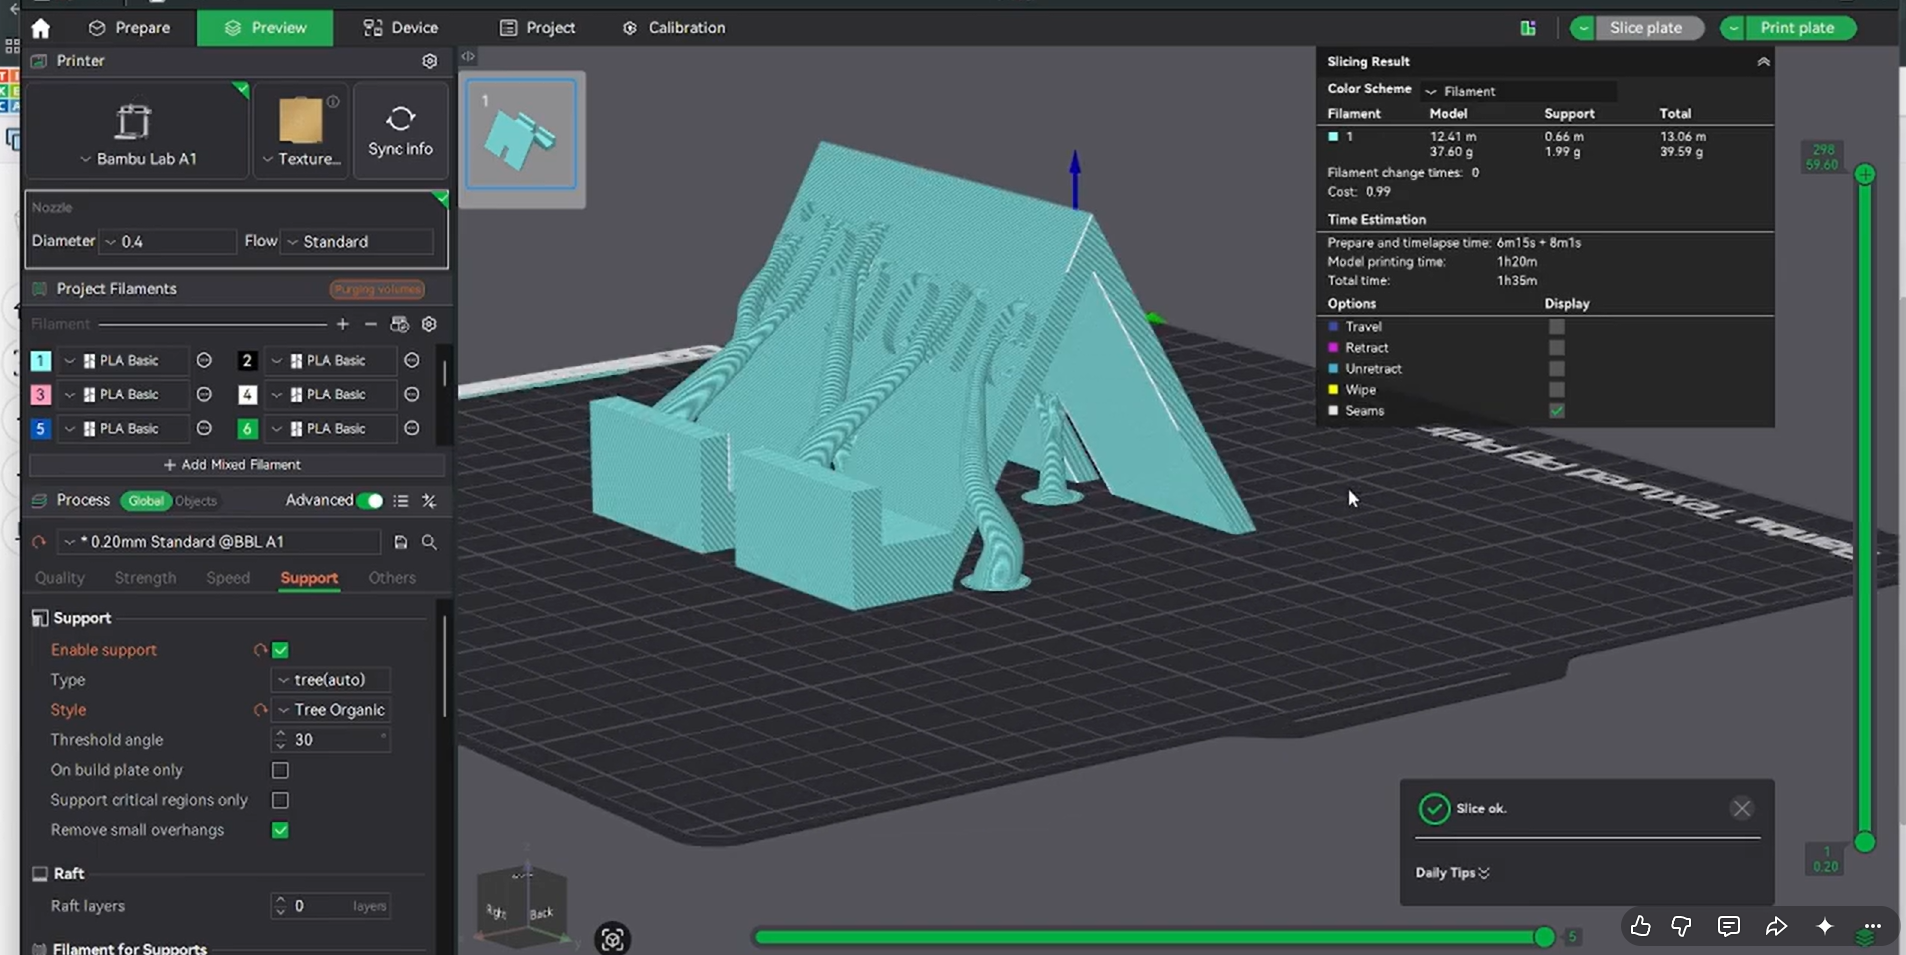
Slice the model and check the preview. This build came out to roughly 12.6g of filament and about 1 hour 26 minutes of print time.
Step 8 – Print
Send the sliced file to your printer and print as normal. Once it’s done, snap the supports away and your phone stand is ready to use.
Note: dimensions above are approximate, read directly off the on-screen measurements in the video — swap in whatever sizes fit your own phone.
Final Thoughts
And that’s it — a complete phone stand designed from scratch in Tinkercad, with a hollow A-frame back for strength, a front ledge to hold the phone, a notch so you can still charge it while it’s docked, and a personalized text engraving to make it your own.
The whole design only uses a handful of basic shapes and two Group operations, which makes it a great first project if you’re new to 3D modeling.
Once you’ve printed this version, try customizing it further: swap the text for your own name, resize it to fit a tablet, or scale the notch for a different cable type.
If you build one, I’d love to see it — drop a photo in the comments or tag me on social media.
FAQ
Do I need any design experience to follow this tutorial? No. Tinkercad is built for beginners, and this entire phone stand is made from basic shapes (Roof, Box, Text) combined with the Hole and Group tools — no scripting or advanced CAD skills required.
Is Tinkercad free to use? Yes. Tinkercad is free with an Autodesk account and runs entirely in your browser, so there’s nothing to download to design your model.
Why does the design use a “Hole” shape instead of just building the groove directly? Setting a shape to Hole lets you cut precise negative space out of a solid shape. It’s how Tinkercad handles subtraction, and it’s the easiest way to create the phone groove and cable notch without modeling each piece separately.
Do I need supports to print this phone stand? Yes. The angled A-frame back creates an overhang, so this build uses Tree (Auto) supports with a 30° threshold angle in Bambu Studio. Most slicers have an equivalent auto-support setting.
What print settings and material were used? This build was sliced in Bambu Studio for a Bambu Lab A1, using standard PLA. It came out to roughly 12.6g of filament and about 1 hour 26 minutes of print time, though this will vary depending on your printer and infill settings.
Can I resize this for a tablet or a different phone case? Yes. Since the whole model is grouped from simple shapes, you can select the finished design and scale it up, or go back and adjust the Roof and Box dimensions individually before grouping.
Can I change the engraved text to something else? Yes. Just double-click the Text shape before grouping it and type whatever you’d like — a name, initials, or a logo — then set it to Hole so it engraves into the surface.
This page contains affiliate links and I earn a commission if you make a purchase through one of the links, at no cost to you. As an Amazon Associate I earn from qualifying purchases.