Lithophanes with Cura: Easy Tutorial (Including Our Best Settings)

Lithophanes offer a stunning way to turn your photos into 3D-printed art. When light passes through them, your images come alive with incredible detail and contrast. Using Cura, a popular 3D printing software, you can easily transform any photograph into a lithophane. This guide will walk you through the process step-by-step and share the best settings to get perfect results.
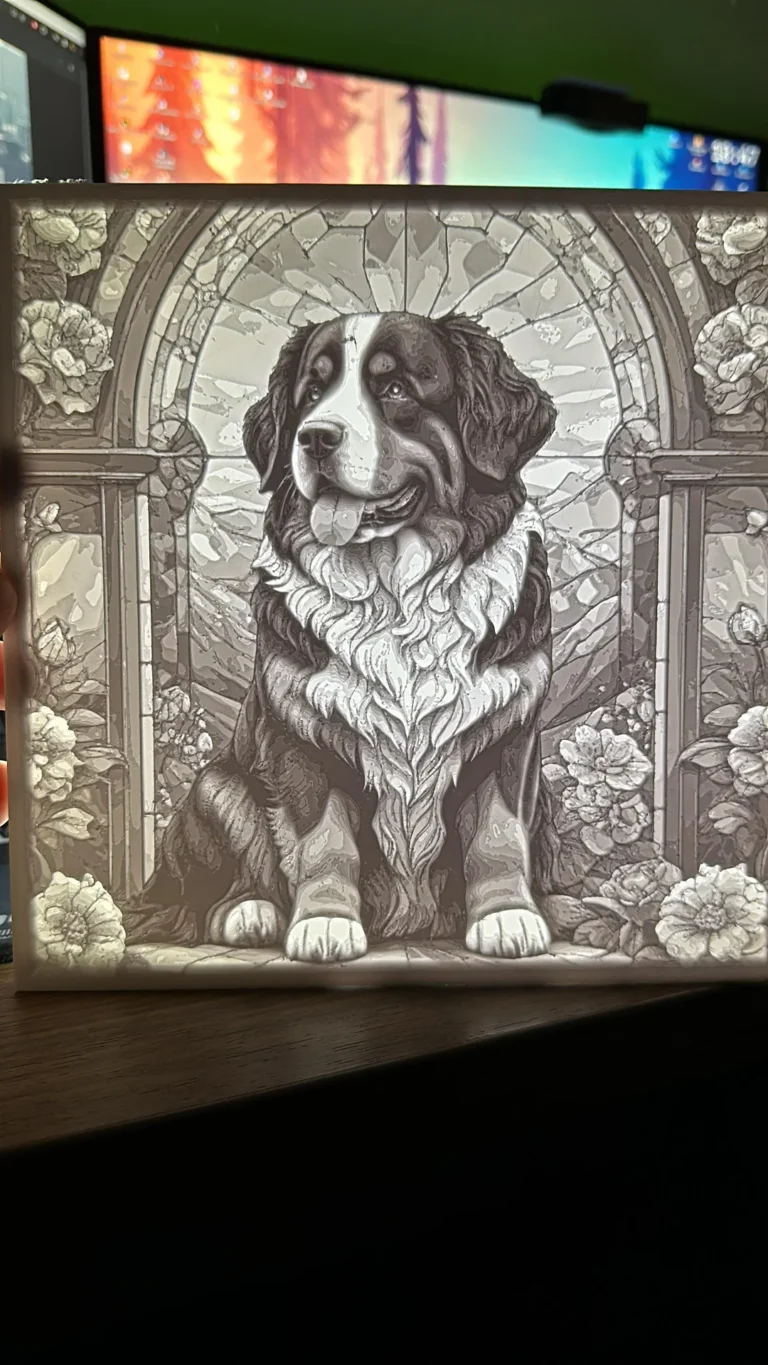
A lithophane of a Dog - credit reddit u/dortn21

What is a Lithophane?

A lithophane is a 3D printed object that reveals its details when backlit. These pieces are typically printed in thin layers of a translucent material. The thickness of these layers varies according to the brightness of the corresponding part of an image: thicker areas allow less light to pass through, creating darker tones.

Step 1: Choose Your Image

  • Select a High-Contrast Photo: Lithophanes work best with images that have high contrast and a wide range of tones.
  • Edit Your Photo: Use photo editing software to convert your image to grayscale and adjust the contrast if necessary.

Step 2: Convert the Image Using Cura

  • Download and Open Cura: If you haven’t already, download Cura from Ultimaker’s website and open it.
  • Import Your Image: Go to the “Extensions” menu, select “Image Converter,” and choose your edited image.
  • Adjust Settings: Set the “Height” to 3mm and the “Base” to 1mm (these dimensions can vary based on your specific needs and printer capabilities).

Step 3: Configure Your Print Settings

Getting the settings right is crucial for a good lithophane print:

  • Layer Height: Use a small layer height for high detail. A height of 0.1mm works well.
  • Print Speed: Slow down your print speed to 30mm/s to ensure details are well-defined.
  • Infill: Set infill to 100% to make sure there are no gaps in your print.
  • Temperature: Printing temperature can affect clarity. Adjust according to the filament you are using, but typically slightly lower than usual temperatures for PLA work well.
  • Supports: Generally, lithophanes do not need supports if positioned correctly.

Step 4: Print Your Lithophane

  • Position the Lithophane Vertically: To get the best results, print your lithophane in a vertical position. This orientation helps in achieving better detail on the Z-axis.
  • Preview and Slice: Use the preview feature in Cura to make any final adjustments and slice your model.

Step 5: Post-Processing

  • Remove from Bed: Be careful when removing the lithophane from the print bed as it can be quite delicate.
  • Lighting Your Lithophane: Place your lithophane in front of a light source to see your image come to life. LED light panels or even your phone’s flashlight can work great.

Conclusion

Creating lithophanes with Cura is a simple yet rewarding project that blends the worlds of photography and 3D printing. By following these steps and adjusting your settings as recommended, you’ll be able to produce stunning 3D artworks that bring your favorite images to light in an entirely new way.

Feel free to experiment with different images and settings to see what works best for you. Happy printing!