How To Optimize Your STL Files For Better Print Quality
Optimizing STL Files for Better Print Quality
3D printing is an art and science that requires precision and skill. Optimizing STL files is crucial for achieving high-quality prints.
In this article, we will cover various aspects of STL optimization to help you get the best out of your 3D printer.
Let’s dive into our 20 key tips for enhancing your STL files.
1. Simplify the model
How to simplify:
- Use software like Tinkercad or Blender.
- Focus on reducing non-essential details.
Benefits:
- Faster print times.
- Reduced risk of print failures.
2. Check for errors
Before printing, ensure your STL file is free from errors. Common issues include holes, non-manifold edges, and intersecting faces.
Tools to use:
- Klipper
- Bambu Slicer
Steps:
- Import your model into the software.
- Run the repair functions to fix errors.
3. Optimize wall thickness
Ensure your model’s walls are thick enough to print correctly but not so thick that they waste material.
Recommended thickness:
- For small parts: 0.8-1.2 mm
- For larger parts: 1.5-3 mm
Tools:
- Tinkercad
- Fusion 360
4. Adjust orientation
Proper orientation can improve print quality by reducing supports and enhancing surface finish.
Considerations:
- Minimize overhangs.
- Optimize for strength.
Software:
- Cura
- PrusaSlicer
5. Use supports wisely
Supports are necessary for overhangs but can affect surface quality. Optimize their placement to reduce impact.
Tips:
- Use the “tree supports” feature in some slicers.
- Remove supports carefully to avoid damage.
6. Optimize infill density
Infill density affects strength and material use. Choose the right infill pattern and density for your model.

Common infill patterns:
- Grid
- Honeycomb
- Gyroid
Density recommendations:
- Functional parts: 20-50%
- Decorative items: 10-20%
7. Smooth surfaces
Smoothing surfaces can enhance appearance and functionality. Use post-processing techniques like sanding or chemical smoothing.
Materials:
- Sandpaper
- Acetone (for ABS)
Steps:
- Sand gently with fine-grit paper.
- Use chemical baths carefully.
8. Scale appropriately
Scaling your model up or down can affect print quality. Maintain proportions to ensure structural integrity.
Tools:
- Any slicer software
Steps:
- Scale uniformly.
- Check wall thickness after scaling.
9. Use the right material
Different materials have different properties. Choose the right filament for your model’s requirements.
Common materials:
- PLA: Easy to print, good for beginners.
- ABS: Durable, heat-resistant.
Considerations:
- Strength
- Flexibility
- Temperature resistance
10. Calibrate your printer
Regular calibration ensures consistent print quality. Focus on bed leveling and extruder calibration.
Calibration steps:
- Level the bed.
- Adjust the extruder steps per mm.
Tools:
- Calibration prints
- Digital calipers
11. Control temperature
Proper temperature settings are crucial for print quality. Ensure your printer’s bed and nozzle are set to optimal temperatures.
Typical settings:
- PLA: 190-220°C (nozzle), 60°C (bed)
- ABS: 220-250°C (nozzle), 90°C (bed)
Tools:
- IR thermometer
- Thermal camera
12. Use quality filament
High-quality filament reduces print issues like clogging and inconsistent extrusion. Invest in reputable brands.

Top brands:
Storage tips:
- Keep filament dry.
- Use airtight containers with desiccants.
13. Optimize layer height
Layer height affects surface finish and print time. Choose the right height for your model’s needs.
Recommendations:
- Fine detail: 0.1 mm
- Standard prints: 0.2 mm
- Fast prints: 0.3 mm
14. Maintain your printer
Regular maintenance extends your printer’s lifespan and ensures quality prints.
Tasks:
- Clean the nozzle.
- Lubricate moving parts.
- Check for loose screws.
15. Use cooling fans
Cooling fans can improve print quality by solidifying layers faster, reducing warping and sagging.
Fan settings:
- PLA: 100% fan speed
- ABS: Lower or no fan speed
Adjustments:
- Use slicer settings to control fan speed.
16. Optimize travel moves
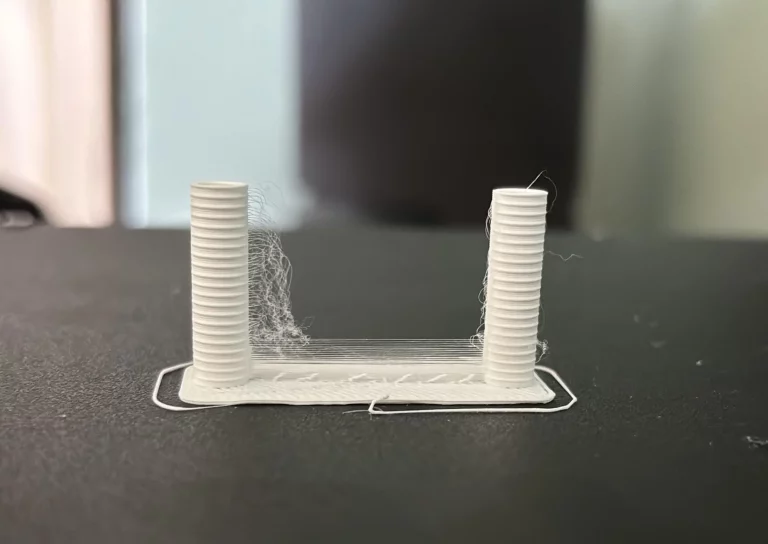
Reducing unnecessary travel moves minimizes stringing and improves print speed.
Settings:
- Enable retraction.
- Optimize travel path in slicer.
Benefits:
- Cleaner prints.
- Reduced print times.
17. Experiment with retraction
Retraction settings help prevent oozing and stringing. Fine-tune these settings for better prints.
Parameters:
- Retraction distance
- Retraction speed
Tips:
- Start with default settings.
- Adjust based on filament type.
18. Manage overhangs
Overhangs can cause print issues. Design with angles in mind to minimize problems.
Angles:
- Stay below 45 degrees if possible.
Techniques:
- Use support structures.
- Split the model if necessary.
19. Test print regularly
Regular test prints help identify issues early, allowing for timely adjustments.
Types of test prints:
- Calibration cubes
- Benchy boat
Benefits:
- Detects calibration issues.
- Provides a benchmark for quality.
20. Leverage online resources
Numerous online communities and resources offer advice and troubleshooting tips.
Resources:
- Thingiverse
- Reddit 3D Printing
- YouTube tutorials
Benefits:
- Learn from experts.
- Find STL files and print settings.
Other Reading For 3D Printing
Which File Format To Use For 3D Printing?
| Issue | Solution |
|---|---|
| Non-manifold edges | Use repair tools in your slicer software |
| Holes | Use slicer to fill gaps |
| Intersecting faces | Simplify model in Blender |
- PLA:
- Nozzle Temperature: 190-220°C
- Bed Temperature: 60°C
- Fan Speed: 100%
- ABS:
- Nozzle Temperature: 220-250°C
- Bed Temperature: 90°C
- Fan Speed: Low
This page contains affiliate links and I earn a commission if you make a purchase through one of the links, at no cost to you. As an Amazon Associate I earn from qualifying purchases.


